FIT Hits the PAN Friday – Sausage Veggie Lasagana

My father-in-law was in town so I decided to make lasagna. Mainly because it is super simple and also because the last time I cooked for him, we were on the Engine 2 Diet and I made vegan lasagna. My father-in-law was born and raised in a very small town in Alabama. They don’t take kindly to vegan anything, so you can imagine his face when I told him what was in that lasagna and I had to redeem myself. This definitely did it; he had two helpings!

This dish is not super healthy but you could tweak it a bit to make it healthier by substituting low fat cheese (do not use fat free as it doesn’t melt). Don’t skimp on the sausage because that is what gives the dish it’s flavor. You could also sub zucchini noodles instead of regular pasta. Remember that zucchini holds a lot of water so it will upset the consistency of the lasagna if you are not careful. Make sure you place it on paper towels and press it between two dinner plates before you use it! Pardon the quality of my photo :-/

10562966_10204093325955566_1038924145837066342_n


Sausage Veggie Lasagna

Ingredients:

  • 2 links sweet Italian turkey sausage (lean)
  • 1 -16 oz container of part-skim ricotta
  • 1 bag shredded mozzarella
  • 1 jar spaghetti sauce (we use Publix Garlic & Onion)
  • 1 box no-boil lasagna noodles (we use Barilla)
  • 2 medium carrots, shredded
  • 1 medium zucchini, shredded
  • 2 cups baby spinach, rinsed and dried
  • 1 can diced tomatoes with oregano
  • 1 tsp cumin
  • 1 tsp paprika

Directions:

  • Pre-heat oven to 375 degrees
  • Remove the  sausage from the casings and break up in a medium skillet
  • Cook the sausage all the way through
  • Turn heat to medium-low
  • Add diced tomatoes, jar of sauce, carrots, zucchini and spices and mix well
  • Simmer on low for 15-20 min until carrots are tender
  • Once sauce is ready, ladle a large spoonful into bottom of prepared pan (9×13 glass is best)
  • Add layer of noodles to the pan, then layer ricotta, spinach, mozzarella, sauce until the pan is full.
  • Top with mozzarella, cover with aluminum foil and bake for 30 minutes.

*Covering the lasagna with foil while baking keeps it from drying out.


FIT Hits the PAN Friday – Healthy Chicken Parmesan Over Spaghetti Squash

Spaghetti squash is a staple in this house. I love that you can serve it with anything that you would normally serve pasta thus eliminating the carbohydrates. I do enjoy a hearty bowl of pasta every now and then but mostly I am good without it! This dish is so easy I am almost embarrassed to use it for my post but I figure everyone can use an easy meal option from time to time!

We love Italian food but unfortunately most of it is laden with calories. I threw this dish together one night and it has become a regular menu item. You can add different vegetables like spinach, broccoli or carrots to the sauce with the chicken. Either way, I am certain the whole family will be happy!

bigstock-Split-Spaghetti-Squash-8253314

Healthy Chicken Parmesan Over Spaghetti Squash
Serves 4 (recipe can be adjusted for any number of guests)

Ingredients

  • 1 medium ripe spaghetti squash
  • 1 jar of your favorite pasta sauce (or make your own from scratch)
  • 4 boneless skinless chicken breasts*
  • 1/4 c. shredded Parmesan cheese*

*Chicken thighs can also be used but make sure they are boneless/skinless.
*Do not use the Parmesan cheese found in the grocery isles. Make sure it is refrigerated.

Directions

  • Preheat the oven to 350.
  • Cut the spaghetti squash in half using a very sharp, large knife.
  • Scrape out the seeds using a spoon careful not to remove too much of the middle.
  • In a deep baking dish, add about an inch of water and place the spaghetti squash face up.
  • Brush the squash with olive oil and lightly season with salt and pepper.
  • Cover the dish with tin foil and bake for 20 minutes.
  • Pour about 1/2 cup of the sauce in the bottom of a medium – large skillet with a lid and add the chicken. (make sure the pan is large enough for all the chicken)
  • Pour the rest of the sauce on top of the chicken careful not to overflow.
  • Cook the chicken on medium-medium low for about 30-40 minutes or until cooked through. There should be no pink in the middle. Use a meat thermometer if necessary.
  • Once squash is finished cooking, carefully pull it out of the oven and remove it from the dish onto a large cutting board. It will be tender so use caution not to smash it.
  • Allow the squash to cool to a temperature at which you can handle it easily.
  • Scrape the flesh of the squash into a large serving bowl and sprinkle with 2-3 tbsp of the Parmesan cheese. Cover and set aside.
  • Once the chicken is fully cooked, uncover and sprinkle with the remaining Parmesan cheese.
  • Serve the chicken over the spaghetti squash and ladle with the remaining sauce and enjoy!

FIT Hits the PAN Friday – Taco Stuffed Zucchini Boats

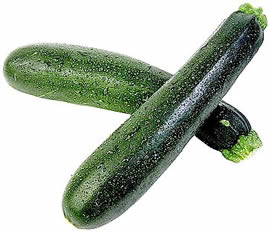
This was the first week of our Summer Slim-Down Challenge so I cooked A LOT! I wanted to be sure there was healthy food readily available throughout the week. My husband complained he could not find his lunch the other morning because the refrigerator was too full :-/ I was thinking that is not a bad issue to have! Zucchini is one of my favorite summer staples because they are always on sale and they are very versatile. They are high in Vitamin A & C and are also a great source of Potassium and Calcium.

zucchini

I pulled five recipes from Skinny Taste (which you all should know by now is my favorite recipe website). I have not met a recipe on their website that I didn’t like! My husband raved about the Taco Stuffed Zucchini Boats so I will share those with you. I made the mistake of preparing three recipes at once, so I was a bit overwhelmed while I cooked this dish. The dish itself is simple to make and it would easy to double if you have a large group of guests. I used ground chicken in place of the turkey because that was what I purchased this week 🙂 Enjoy!

Taco Stuffed Zucchini Boats
Skinnytaste.com
Servings: 4  • Size: 2 halves  • Old Points: 6 pts • Weight Watcher Points+: 7 pt
Calories: 286 • Fat: 12 g • Carb: 18 g • Fiber: 5 g • Protein: 28 g • Sugar: 6 g
Cholest: 8 mg

Ingredients:

  • 4 medium (32 ounces) zucchinis, cut in half lengthwise
  • 1/2 cup mild salsa
  • 1 lb 93% lean ground turkey
  • 1 tsp garlic powder
  • 1 tsp cumin
  • 1 tsp kosher salt, or to taste
  • 1 tsp chili powder
  • 1 tsp paprika
  • 1/2 tsp oregano
  • 1/2 small onion, minced
  • 2 tbsp bell pepper, minced
  • 4 oz can tomato sauce
  • 1/4 cup water
  • 1/2 cup reduced fat Mexican blend shredded cheese
  • 1/4 cup chopped scallions or cilantro, for topping

Directions:

Bring a large pot of salted water to boil. Preheat oven to 400°F. Place 1/4 cup of salsa in the bottom of a large baking dish.

Using a small spoon or melon baller, hollow out the center of the zucchini halves, leaving 1/4-inch thick shell on each half. Chop the scooped out flesh of the zucchini in small pieces and set aside 3/4 of a cup to add to the taco filling, (squeeze excess water with a paper towel) discarding the rest or save to use in another recipe. Drop zucchini halves in boiling water and cook 1 minute. Remove from water.

Brown turkey in a large skillet, breaking up while it cooks. When no longer pink add the spices and mix well. Add the onion, bell pepper, reserved zucchini, tomato sauce and water. Stir and cover, simmer on low for about 20 minutes.

Using a spoon, fill the hollowed zucchini boats dividing the taco meat equally, about 1/3 cup in each, pressing firmly. Top each with 1 tablespoon of shredded cheese. Cover with foil and bake 35 minutes until cheese is melted and zucchini is cooked through. Top with scallions and serve with salsa on the side.

Motivational Monday – Summer Slim-Down Challenge Week One!

bigstock-Motivational-Background-52260721

Today marks the beginning of the Summer Slim-Down Challenge! I am very excited! Over the next six weeks, there are 45 people participating in the journey to a healthy lifestyle! This is a self-guided program so there are no meals plans or grocery lists. You set your own goals and we will be there to make sure you meet them!

If you would like to join us, there is no cost. Please visit the event page on Facebook! I will be posting all the recipes I make over the next six weeks and I also put together some helpful tips to get you started. All of this info can be found on my website http://www.iveynutritionandwellness.com/Challenge.

This event is designed to not only help people get a jump start on weight loss but more importantly set the foundation to live a healthy lifestyle! We all know diets are temporary and while the initial weight loss is exciting, many times the programs involve eating habits that are not manageable over the long-term.

I want to break you out of that diet trap and bring about an educated, practical lifestyle change! I am looking forward to seeing the positive changes in everyone’s lives as we embark on this journey. I will be participating in the challenge as well! Over the last year I put weight back on that I thought I had lost forever. My goal is to lose 8 pounds over the next six weeks! I know that I will have to work hard, but I also know the end result is worth every drop of sweat in the gym and every passed-up cookie!

Your partner in health,

Jenn


FIT Hits the PAN Friday – Veggie Overload Chili

I was told by my husband this is the best chili recipe yet so I had to share it with you. Chili is one of those dishes that you can really make your own. We hosted a Salad Master dinner party about a month ago and as a gift received the SaladMaster tool! For those of you unfamiliar with the SaladMaster brand, it is a US company that has been around since the 40’s. They sell water-less/oil-less cookware titanium cookware. The Salad Master tool is their signature piece and it is my new favorite kitchen tool! There are five different cones that fit to the tool to grate, slice and shred vegetables and fruit to your liking! When we decided to make chili, we used the tool to add a ton of veggies. You can use any tool to prepare your vegetables.

bigstock-Fresh-Organic-Vegetables-In-Wi-47214697

Veggie Overload Chili
Serves 15
Nutrition Info: Calories 124, Fat 1g, Protein 9g, Sugar 5g, Carbs 21g Sodium 508mg

Ingredients

  • 3 cans dark red kidney beans, rinsed and drained
  • 8 oz lean ground turkey, browned
  • 2 – 14.5 oz cans diced tomatoes (low sodium is best)
  • 1.5 cups low sodium chicken broth
  • 2 raw medium carrots, chopped
  • 1 cup zucchini squash, chopped
  • 1 cup sweet potato, diced
  • 1/2 medium onion, diced
  • 3 cloves garlic, minced
  • chili powder to taste (I used 5 tbsp, but we like it spicy)
  • dash of cayenne pepper
  • dash of pumpkin pie spice

Directions

  • Cook the turkey in a skillet until cooked through
  • Add all ingredients to crock pot and mix well
  • Cook on HIGH for 1 hour, then LOW for 3-4 hours (if you are leaving it all day, cook it on low)

You can add as many vegetables as you like! This is your creation 🙂 Enjoy!

FIT Hits the PAN Friday – Brian’s Vegetable Soup

green and red healthy food

I did not cook much this week. We made a huge batch of soup earlier in the week and just finished it today. I love vegetable soup because anything goes! You can make it chunky (or not) and you can add all the veggies you have left in the refrigerator and it all blends well together. My husband has a base he uses that is always a great hit. Enjoy!

Brian’s Vegetable Soup

Ingredients (you can use any variety of vegetables)

  • 1 tsp olive oil (to saute’ the onions and garlic)
  • 2 cups of low sodium chicken broth
  • 2 cups of carrots (sliced or diced)
  • 1 cup celery chopped
  • 1 cup frozen peas
  • 1 can kidney beans (you can use dried for lower sodium but make sure you cook them before you add them)
  • 1 medium sweet potato peeled and diced
  • 1 cup diced onions
  • 3 cloves garlic, minced
  • 1 can diced tomatoes

In a large stock pot or dutch oven, saute’ the garlic and onions in the olive oil until clear. Add all of the liquid to the pot. Last, add all of the veggies and let simmer on medium-low for 2-3 hours. The liquid amount is really your preference. I prefer a chunkier soup and my husband likes it, well, more soupy!

Serve with your favorite crusty bread, over rice, over mashed potatoes or by itself! We ate it with cheese tortellini last night and it was very good!

The Nutribullet Challenge

OK, so it is not really a challenge per say. As you may have read in past posts, I finally reach my goal weight after several months of hard work (yay!).  As I am sure many of you can relate once we meet that goal it is easy fall back into destructive patterns. Gradually, the sweets and french fries made their way back into my diet and before I knew it the couple of pounds had taken residence once again. I decided to try the Nutribullet not only to lose those couple of pounds but also to increase my nutrition. There are many juicing and emulsifying products available and I am not writing this to encourage you to purchase one or the other. I chose this one based on my research and budget.

IMG_0178[1]

I have made three shakes so far. The first was so-so because I was experimenting. Just like at those “create your own bowl” restaurants, not all flavors work well together. My next two shakes came out really good! I think I am getting the hang of it. The book that came with the blender suggests starting with a 50% base of greens (kale, swiss chard, spinach). Personally, I love the kale and it is virtually flavorless when mixed with the fruits. Then you are instructed to add a variety of fruits and last a “blast” of nuts, flax seed, coconut oil, etc.

Has anyone tried shakes using a Nutribullet or a Vitamix? What are your favorite recipes? Here are the recipes for the two I liked the best (so far :)).

Tropical Shake

  • 1 cup kale, chopped
  • 1/4 cup raspberries
  • 1 small banana
  • 1/4 champagne mange (peeled)
  • 6 slices seedless cucumber with peel
  • 1 scoop Garden of Life – Beyond Organic Raw Protein Powder (Plain)
  • 1 tsp Stevia granules
  • 1/2 cup unsweetened almond milk
  • 1/4 cup water

1 Serving

Simple Shake

  • 1 cup kale, chopped
  • 1/2 small banana
  • 5 medium strawberries
  • 1/4 nave orange peeled (the peel is very bitter)
  • 1/2 cup Silk pure coconut milk
  • 1/2 apple cored and seeded
  • 1 scoop Garden of Life – Beyond Organic Raw Protein Powder (Plain)
  • 1/4 cup water

1 Serving

Happy Blending!

FIT Hits the PAN Friday – Loaded Black Bean Sweet Potato Boats

I stared at this recipe for about a week before I got to it and never actually read all the ingredients. I find myself starting recipes without reading through them all the way quite a bit lately…I must get that from my mother :). I did not have any sour cream since we still have not jumped back into eating a lot of dairy, so I topped the potatoes with diced avocado instead. I also substituted shredded low fat Mozzarella for the Manchego. I recommend using the Manchego; the smokiness will provide more flavor to the dish. I plan on making these again the correct way so I can get the full experience! However, even with the substitutions it is a terrific recipe and super easy! Enjoy!

Prep time: 10 mins
Cook time: 40 mins
Total time: 50 mins

Loaded sweet potato boats with black beans, manchego cheese, salsa, onion and simple avocado crema.

Author: Minimalist Baker – Check out the rest of this site if you have some time; she is an amazing food photographer!
Recipe type: Entree, Appetizer
Cuisine: Vegetarian, Gluten Free, Mexican
Serves: 3-4

Ingredients

  • 5 small sweet potatoes
  • 1 15 ounce can black beans, drained and rinsed
  • ~1/4 cup grated Manchego or other Mexican cheese (such as Cotija or Pepperjack)
  • Avocado crema (1/4 cup light sour cream, 1/2 ripe avocado & lime juice)
  • Fresh Salsa, Cilantro and Green Onion for topping and dipping.

Instructions

  1. Bake sweet potatoes in a 400 degree oven directly on the baking rack for 40-45 minutes or until tender to the touch.
  2. In the meantime, make avocado crema by mixing 1/2 a ripe avocado, 1/4 cup light sour cream and a bit of lime juice until creamy and smooth. Refrigerate until potato boats are ready to serve.
  3. Remove from oven to cool to the touch, but leave oven on.
  4. Carefully cut sweet potatoes in half and scoop out insides to make “boats.” Leave ~ 1/4 – 1/2 inch of flesh so they don’t become too fragile and difficult to handle.
  5. Reserve leftover sweet potato for sweet potato almond butter muffins, or another recipe of your choice.
  6. Place sweet potato boats face up on a baking sheet and fill with black beans and top evenly with grated cheese.
  7. Pop back in oven to warm through and remove when cheese is melted and bubbly.
  8. Remove from oven and arrange on a serving platter. Top with salsa, avocado crema, chopped green onion and fresh cilantro. Additional toppings might include guacamole, hot sauce and lettuce.
  9. Will reheat well the next day or two in the microwave or oven.
Nutrition Information
Serving size: 1 sweet potato boat Calories: 157 Fat: 5 g Carbohydrates: 23 g Sugar: 0 g Sodium: 44 mg Fiber: 4.6 g Protein: 4.8 g

FIT His the PAN Friday – Healthy Brownies!

My favorite part of vegan baking is that you can safely lick the batter off the spatula 🙂 I cannot remember how I came across this recipe (probably cruising Pinterest), but it was originally posted on HealthyVeganRecipes.net. I am a huge fan of making recipes when I have all the ingredients in my kitchen. There is nothing worse than coming across a fantastic recipe and not having one or two of the ingredients!  This recipe is super-easy and if the batter is any indication of how the brownies will taste, they should be very good (I wrote this part while they were still in the oven). The final product is also very good! I recommend using a food processor to get the best consistency. I stuck to the original recipe with the exception of the peanut butter; I used almond butter instead.


IMG_0032

Healthy Brownie Recipe

Prep time: 15 minutes
Cook Time: 30 minutes
Time from start to eating: 45 minutes
Makes 16 brownies

Nutrition Info per Brownie:
178 calories/9g sugar/7g fat/6g protein/271mg sodium

Ingredients

  • 1 14oz can kidney or black beans
  • 1 banana
  • 1/2 cup fresh medjool dates, pitted*
  • 1/2 cup non-dairy milk
  • 1/2 cup natural peanut butter (or any other nut/seed butter)
  • 1 tsp vanilla extract
  • 1 tsp apple cider vinegar
  • 1 tsp baking powder
  • 1/2 tsp baking soda
  • 3/4 cup cocoa and/or carob powder
  • 1/2 cup raisins, dried cranberries or chocolate chips (or a mix of any or all)
  • 1 cup sorghum flour (or any whole grain flour)

*Note: If you prefer, or if you’re not using a food processor, you can replace the dates with 1/2 cup unrefined sugar.

Healthy Brownie Recipe Directions

  1. Preheat the oven to 400 degrees F (or your BBQ on low, about 450 degrees F).
  2. Put the beans, banana, dates, milk, nut/seed butter, vanilla and apple cider vinegar in a food processor and puree until smooth. If you don’t have a food processor, you can mash the beans and banana, and chop the dates up as finely as you can. The sweetness won’t be as even as if you puree, so you may want to add some unrefined sugar.
  3. Add the baking powder, soda, cocoa/carob powder and flour and pulse until they’re incorporated. Don’t overmix here. Sprinkle the raisins, cranberries or chocolate chips into the mix and push them into the batter (don’t puree them).
  4. Pour the batter into a greased or lined 8″ brownie dish and put in the oven for 30-40 minutes.
  5. Once the brownies are cooked, pull them from the oven, let them cool completely and then cut into squares and serve. If you want to keep your brownies longer, they freeze very well.

FIT Hits the PAN Friday – Vegetarian Meatloaf

We are nearing the end of the Engine 2 Diet – 28 Day Challenge. It has been a great (and sometimes trying) experience. My husband lost 15 pounds and I have stayed at my goal weight. A couple other of our group participants have also lost weight. While we are not prepared to continue to eat a vegan diet indefinitely, we do plan to limit our animal product intake and be much more selective of the types of animal products we purchase.

I found this recipe when searching for a recipe to use my cooked green lentils. This recipe is not vegan, nor is it Engine 2 Approved because of the cheese. I adapted the recipe to eliminate the egg, so you could ultimately eliminate the cheese as well. Ground nuts or vegan cheese may be a good substitute. Unfortunately, the vegan cheese I purchased was awful so I used real cheese that I had in the freezer. This would be a great recipe to use in place of meatballs too!

My recipe was adapted from this Food.com recipe, Really Good Vegetarian Meatloaf (Really!). By substituting EnerG Egg Replacer for the eggs and cutting the cheese quantity, I saved several grams of fat and most of the cholesterol. I will put my changes in red and the nutrition info will be using my substitutions.

meatloaf

Photo Credit: OurVeggieKitchen.com

Really Good Vegetarian Meatloaf (Really!)

2 cups water
1 teaspoon salt
1 cup lentils
1 small onion, diced
1 cup quick-cooking oats
3/4 cup (1/4 cup)  grated cheese
1 egg, beaten (EnerG Egg Replacer – follow product instructions)
4 1/2 ounces spaghetti sauce or 4 1/2 ounces tomato sauce
1 teaspoon garlic powder
1 teaspoon dried basil
1 tablespoon dried parsley
1/2 teaspoon seasoning salt
1/4 teaspoon black pepper
Directions:

  • Add salt to water and boil in a saucepan.
  • Add lentils and simmer covered 25-30 minutes, until lentils are soft and most of water is evaporated.
  • Remove from fire.
  • Drain and partially mash lentils.
  • Scrape into mixing bowl and allow to cool slightly.
  • Stir in onion, oats and cheese until mixed.
  • Add egg, tomato sauce, garlic, basil, parsley, seasoning salt and pepper.
  • Mix well.
  • Spoon into loaf pan that has been generously sprayed with Pam (non-stick cooking spray) or well-greased.
  • Smooth top with back of spoon.
  • Bake at 350 degrees for 30- 45 minutes until top of loaf is dry, firm and golden brown.
  • Cool in pan on rack for about 10 minutes.
  • Run a sharp knife around edges of pan then turn out loaf onto serving platter.

Enjoy!